Temperature Calibration - 16 Tips and tricks from the real world
- 11 Dec 2020
Anyone who has been in the calibration business for as long as we have knows that experience is priceless. Time has a way of teaching you what works and what doesn’t. When things are working right, the cal lab may not be a very exciting place, but it does mean you did your job. So, here are a few tips and tricks you can use to keep things up and running. These include tips on:
- How to get the best calibration results
- How to protect your calibration investments
- How to minimize the number of tools you take onsite
- How to get rid of paper chart recorders
- How to do more in less time
Tip 1 - The truth about calibrating temperature sensors
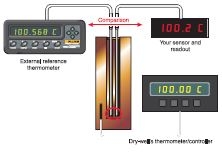
Some folks have been fooled into believing that you couldn’t calibrate a temperature sensor if you wanted to, because a sensor cannot be physically adjusted. The truth is: yes you can. There are two ways to do it. You can calibrate the sensors as part of a system, or you can calibrate the sensors individually. When calibrated as part of a system, the sensor is physically heated or cooled to a known temperature and corrections are made directly to the electronics connected to the temperature sensor. In the second method the temperature sensors are calibrated separate from the electronics and receive a calibration report with corrections that are later entered into the electronics connected temperature sensor for an accurate temperature reading.
Other well meaning individuals fall into the trap of forgetting to calibrate the temperature sensor, because they have already calibrated the temperature electronics. It’s an easy trap to fall into but a costly one! Most of the error resides in the sensor itself because the sensor is the part exposed to periods of extreme temperatures and frequent thermal cycling. To calibrate the sensor you need a temperature source that physically heats or cools and you need an accurate value for the temperature.
Tip 2 - Calibration baths usually deliver the best results
The traditional approach to temperature calibration is to send temperature probes and thermometers to a calibration laboratory. There the temperature instruments are placed in calibration baths and compared to higher accuracy temperature standards whose values are traceable to national or international standards (i.e. NIST-traceable). This method produces excellent results, can be used with almost any thermometer and can accommodate a high degree of through put. There are a few reasons that baths are often the first choice.
1. Calibration baths provide a very stable and uniform temperature environment. Stability refers to temperatures remaining constant over time and uniformity refers to the sameness of temperature vertically and horizontally throughout the working region of the calibration bath.
2. Owing to the exceptional stability and uniformity of a calibration bath, they provide the lowest uncertainties possible for comparison calibrations.
3. Calibration baths are compatible with the widest variety of temperature probes. They can accommodate many shapes and sizes and provide sufficient immersion to assure that both the temperature probes and the temperature standard are at the same temperature.
4. Calibration baths are an excellent choice for calibration of many temperature probes in one batch due to the large access openings.
Tip 3 - Boost productivity with multiple calibration baths
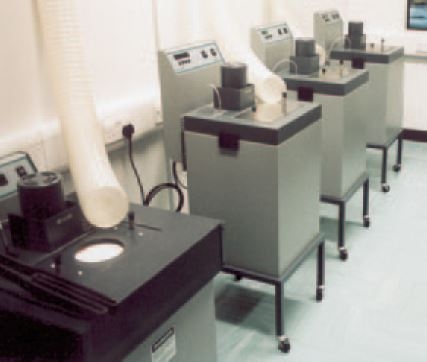
One reason a temperature calibration bath is so stable is the bath fluid prevents the temperature from changing rapidly. This has unwanted side effect of slowing the rate baths change to the next temperature test point. One way to boost productivity is to use more than one bath so that you always are ready for the next cardinal temperature.
Tip 4 - Protect your investment with a triple point of water cell
If you have invested in an SPRT or a secondary reference thermometer for better accuracy, the last thing you want is to lose all of that accuracy because of an accident that you don’t even know about. Accidents can happen when you least expect them to and they can often happen in shipping before you ever take possession of your thermometer. The best way to be sure that your investment is protected is by checking it regularly in a triple point of water cell and comparing the result to your calibration report. The best practice is to keep a chart on the thermometer in a spreadsheet like Excel and watch for any sudden jumps in the reading at the triple point of water (0.010 °C).
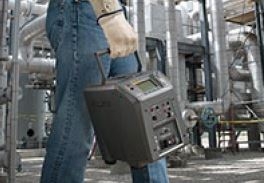
Tip 5 - Minimize the number of tools you take onsite
If you perform onsite calibrations, time and spaceare a premium and the last thing you need is to spend most of your time hauling equipment around. Try to use the fewest instruments necessary for the job. For example, the process version of the Field Metrology Well is a dry-block calibrator that has all of the electronics you needbuilt right in for measuring RTDs, thermocouples, and thermal switches. It is also a documenting 4-20 mA loop calibrator. You won’t need a computer to automate and document the calibration either. It’s built right in!
Tip 6 - Infrared temperature calibration needs infrared temperature standards
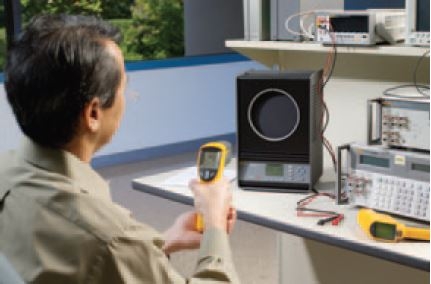
Infrared temperature readings are influenced greatly by the type material and surface finish of the objects they are pointed at, because infrared temperature readings depend on surface emissivity. Infrared calibrators are sometimes called blackbody calibrators even though a flat painted surface is not really a blackbody. Real blackbodies are cavities with a well known emissivity value (i.e. 1.000 ± 0.001) The emissivity of a painted surface is only known if it is measured. Therefore, to calibrate an infrared thermometer you will need to use an infrared temperature standard like a radiometer or you will need a radiometrically calibrated calibrator.
Most infrared calibrators are temperature sources like the 9132 and 9133 that require an infrared temperature standard to compare to the infrared thermometers being tested. However the 4180 Series Precision Infrared Calibrators have been radiometrically calibrated in our infrared thermometry laboratory with some of the lowest uncertainties possible so that expensive extra equipment is not required.
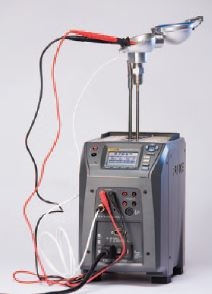
Tip 7 - Boost calibrator accuracy with a platinum resistance thermometer (PRT)
The convenience of a handheld dry-well is very appealing but sometimes you need a little more accuracy. A great way to improve the accuracy of any dry-well is to use a platinum resistance temperature standard for your known temperature instead of the calibrator display. The best dry-block calibrators can directly read PRT standards to improve their display accuracy. A good example is the Field Metrology Well process version.
Tip 8 - Use a dry-well or metrology well to eliminate messy fluids
One great thing about dry-wells is they are dry. That means you don’t have to deal with a lot of messy fluids. This can be very helpful if cleanliness is one of your chief requirements. Of course, there are ways to keep bath fluids from becoming a mess, but why bother if you don’t have to? Fluke Calibration 9170 Series Metrology Wells are so accurate they can be used as an alternative to a calibration bath in many applications. We use Metrology Wells in our lab for certain calibrations, and you can do that too or take them onsite.
Tip 9 - Calibrate more workload with a calibration bath
The great thing about a calibration bath is that the working area can be large enough to calibrate several probes at a time (our laboratory usually calibrates 10 at a time), and the probes can have a range of shapes and sizes. So if your customers or coworkers may bring you anything under the sun to calibrate then you definitely want a calibration bath. But, what if you still need to calibrate all of those different kinds of probes onsite? Use a Micro-Bath. They are easily carried in one hand, but still have many calibration bath advantages.
Tip 10 - Conveniently check devices onsite with a handheld dry-well
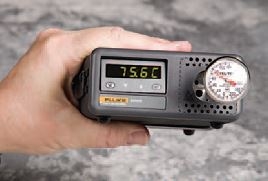
If you’re just getting started with temperature calibration you probably want to look at the 9100S dry-wells. Anyone can learn to use one in less than 15 minutes, they are inexpensive, and they literally fit in the palm of your hand. You can use them to easily check RTDs, thermocouples and small dial thermometers because the display accuracy is ±0.25 °C.
Tip 11 - Capitalize on your intuition with a graphing digital thermometer
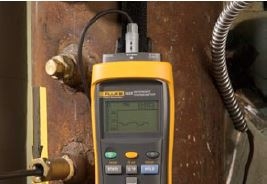
The best way to understand your data is to see it. The best digital thermometers help you visualize your data. A good example is the Fluke Calibration 1523 and 1524 Handheld Reference Thermometers which let you graph your data in real time. It’s easy to know when to take a measurement if you can see for yourself the temperature is stable.
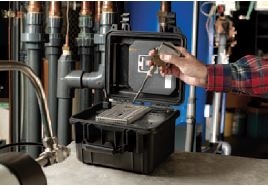
Tip 12 - Throw away the paper charts and use a digital thermo-hygrometer

Use a digital thermo-hygrometer to record temperature and humidity for you calibration reports. If you use paper charts then you also probably have to keep boxes full of paper charts for years so that you will be in compliance. And if you have ever had to go back and find one of those paper charts for an audit then you’ll understand why you might wish you’d never seen a paper chart recorder. You are much better off with a digital thermo-hygrometer like “the DewK” 1620A that records the data in a database for easy retrieval when you need it. Plus you get a lot of great analytics with its LogWare III software and you get compatibility with MET/ CAL® software so you can have the data pulled directly into your calibration reports.
Tip 13 - Calibrate two temperatures at the same time
There are a variety of methods for calculating the true cost of downtime. Rather than calculate those costs, why not avoid them. Preventative maintenance like calibration helps manage the risk of downtime. The ability to calibrate quickly is an advantage. Rather than wait for calibrators adjust their temperature to the next test point, use a dual-block (9011) or dual-well dry-well (9009) to run two temperatures simultaneously. With one block (or temperature well ) set at your high temperature and the other preset at a low temperature you can quickly calibrate all of your RTDs and thermocouples without waiting for the block to change temperatures. That’s smart.
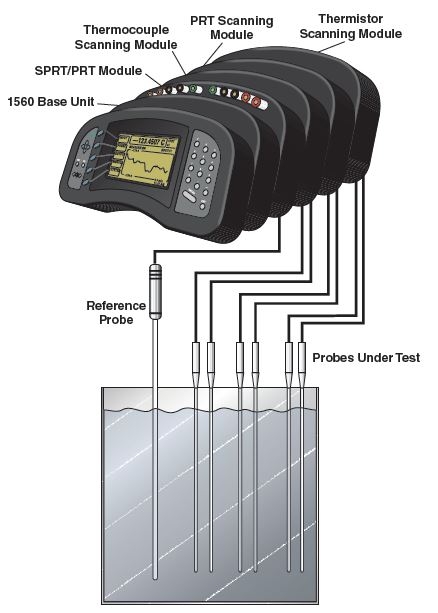
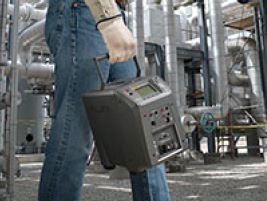
Tip 14 - Read multiple thermometers simultaneously
There’s more than one reason why measuring multiple thermometers at the same time could be a good idea. One is that you can be more productive if you can calibrate multiple devices in parallel rather than sequentially. Another reason for simultaneous measurement can be accuracy. If your temperature source is not very stable try measuring the reference and the device under test at the same time. Measuring both at the same time can reduce the uncertainty in your measurement by eliminatingtime dependent temperature differences. With four independent measurementcircuits the Fluke Calibration 1529 reads up to 4 RTDs, thermistors, or thermocouples simultaneously.
Tip 15 - Compensate for ambient temperature variation
One difference between working onsite and working in the lab is that temperature control is rarely very good on the shop floor. Environmental conditions are typically unstable, having wide temperature variations. That’s why each 914X Field Metrology Well has a built-in gradient-temperature compensation (patent pending) that adjusts control characteristics to ensure stable performance in unstable environments. In fact, all specifications are guaranteed over the environmental temperature range of 13 °C to 33 °C.
Tip 16 - Cover more workload with removable inserts
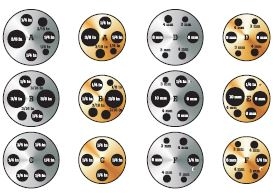
If you are using a dry-well calibrator and you have to calibrate a probe that does not fit snuggly into one of the wells, you still have some options, but putting the probe into a well that’s too large with an air gap around the sheath is not one of them. What you need is another insert with a correctly sized hole. Interchangeable removable inserts make it possible to calibrate a wider variety of probes without giving up on good results. You have the option of ordering interchangeable inserts with any Fluke Calibration dry-well except the 9100S.


